MOM’s employees tend to be do-it-yourselfers. In my case, when my wife and I purchased our first home, we took on a fixer-upper. Alas, mumble-mumble years later we’re still fixing it up. Late last summer my darling wife lovingly mentioned that it was time to get the wheelbarrow out of what should be our living room. It was time for a garden shed.
How big should our new shed be? It needed to fit a ten foot ladder, a lawn mower, a wheelbarrow, garden tools, miscellaneous lumber, and full sheets of plywood. A barn style roof would help with the lumber storage, and we figured a floor plan of eight feet by twelve feet (some might call it half the size of a living room) would fit everything nicely.
The kits and pre-built sheds we saw all seemed to cost too much, and weren’t very well constructed. After drawing up some detailed plans, we figured out that I could build something of better quality for a more affordable price. I ordered the materials, and scheduled a full week off work.
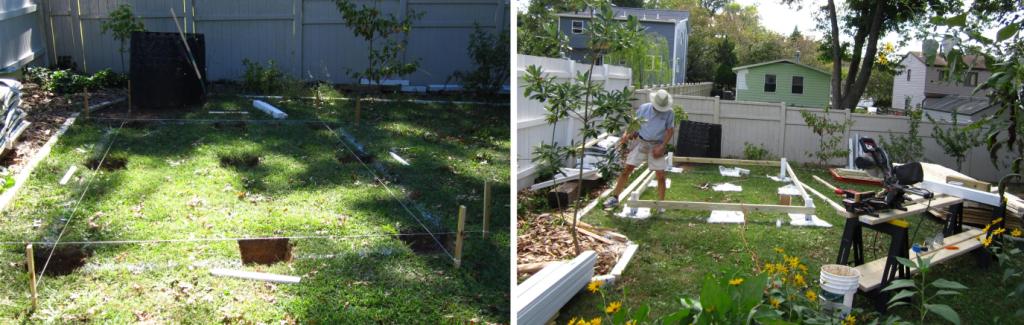
 I started by pouring concrete footings, and building the platform.
 After four days, I began to realize I may not have allotted enough time for this project.
 After the platform came construction of the wall framing and roof trusses. I built them atop the new platform, then moved each section over near the rain garden until they were ready to go up. I reused salvaged lumber where I could.
 My photographer (a.k.a. bride) lent me a hand getting the walls up, and throughout the construction.
 After the fourth wall was up, I started putting roof trusses into place.
 I finished the trusses as my week of vacation ended. Next came roof sheathing and siding … on my days off.
 I fully admit, there were a few “do as I say, not as I do” moments during this project. Never stand on the top step of a ladder. Also, never smash your finger really hard with a hammer.
 Next I applied trim along the roof line, roofing paper, and shingles. My wife began the painting. The shed’s window is one we replaced from our kitchen.
 Trim boards went into place next. Then I used the cut out sections of siding to build a large entry door, and two small doors for the overhead lumber storage.
 The last warm days of the season allowed us to finish the first coat of paint, and to apply caulk along all the trim boards. The next coats of paint would have been barn-red, but cold weather precluded them. A mere two months after beginning my one week project, I set into place a salvaged railroad tie as the shed’s front step.
I wish I could tell you our living room now sports a comfortable settee and coffee table. However, what you would actually find are boxes of flooring, long pieces of crown molding, numerous tools, and of course several gallons of barn-red paint.
Roland works at MOM’s in Rockville, MD

 Besides the fact that biting into a ripe organic nectarine is one of the greatest delights in modern life, there are many wonderful recipes for nectarines. Perhaps one will debut in your home for Father’s Day:

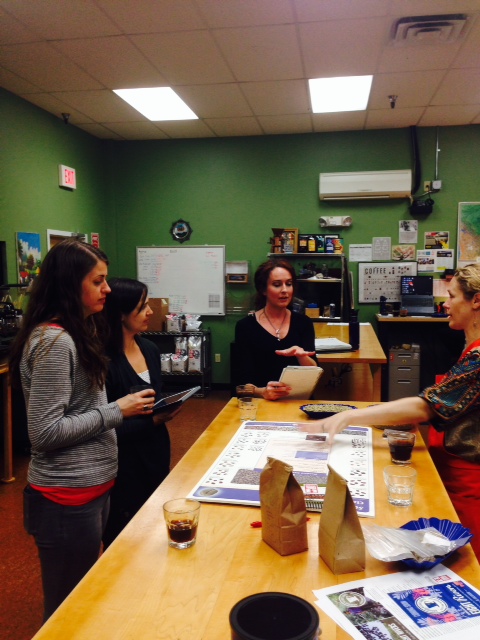
 More recently, I visited the Equal Exchange facility outside of Boston. Upon arriving we spent some time learning from the coffee quality control manager.